Despise Dungeon Re-vamp – A Guided Tour
Return to: Dungeon Guides| Despise Dungeon Re-vamp – A Guided Tour |
| By Petra Fyde and Frarc, August 2012 |
| Where to Begin | Dungeon Inhabitants | Entering the War Zone | Despise Artifacts |
The Mysterious Wisp
The Mysterious Wisp is found on the left hand side of the dungeon entrance. Double clicking the entity begins a conversation and opens a back pack:
You are corporeal-sentient. We would deal with you
There follows a series of questions and answers:
Corporeal?
You are corporeal, we are not
Sentient?
You are sentient. We are sentient
Deal?
We would learn. You would teach. We and you would trade.
Learn? Teach?
We would learn of evil and good. You would teach of evil or good
Good and Evil?
You would guide us. We would follow
Guide?
You would show us why you fight. We would join the mind of one who fights
Follow?
You would show us how to fight.We would command the mind of one who fights
Fight?
In the earth here, find the shrine that resonates. There, ask and we will join you
Resonate?
Good or evil, what resonates in you?
Join?
We will form a corporeal entity that you would touch. Through touch you will command us. We will obey and we will learn
Command?
Command us to join the mind of one who fights. Command us where to fight. Command us when to fight.
Trade?
Collect for us the hateful putrid hearts of those who fight. For those we will give you objects of magic
What does it mean?
The ‘corporeal entity’ that you will touch is a Wisp Orb. The ‘shrine that resonates’ is the one that matches your karma, ‘trade’ refers to the backpack that opens. It contains randomly generated ephemeral armor and weapons which can be bought using the putrid hearts that are gained as you fight. Double click the hearts to convert them into ‘Despise Crystals’, the hearts will disappear, converted to a figure on your Loyalty Ratings Prices in ‘despise crystals’ are shown together with the item’s description. The higher the power level of the creature killed, the more hearts will be awarded.
You are allowed one follower, occupying only one follower slot in addition to your controlled creature.
Where to Begin
On entering the dungeon you must first find the correct shrine. Negative karma characters should take the staircase downwards, postive karma upwards. The map below shows the location of the shrines, which function as normally via the context menu to resurrect, lock karma or tithe gold. There are three pairs of moongates for travel between the levels, also marked on the map.

The Wisp Orb
When you reach the correct shrine double click the Ankh. A Wisp Orb will appear in your pack with the message ‘I will follow thy guidance’. You may only claim one Orb, and thus control one creature.
Double clicking the Orb tells you ‘target a creature to possess’. Choose your companion carefully. Good creatures trained by a postive karma character can reach a maximum level 10, as can evil creatures trained by a negative karma character. However evil creatures trained by a positive karma character or good creatures trained by a negative karma character can reach level 15. Choosing to change the alignment of a creature needs some care, as you will be the focus of an attack from the other denizens of the level, while your companion is ignored until the alignment change takes place with the following message.
Your possessed creature has changed alignment! It may now become more powerful, and you may now add it to your army.
| Dungeon Inhabitants | ||
| Evil Creatures | Good Creatures | Attributes Contributed by ShadowTrauma |
| Phantom | Sileni | Bard – Discords the boss and wisp, but needs to be the main target. If it is not the target it will not discord. A must have if you wish to do the boss as quickly as possible and with less heal spam. Thank you Winkler, Thunderz, Nyses |
| Naba | Nymph | Mage – On a discorded target these can really lay the hurt on, my pick for best damage dealer at this time. These monsters can also poison the boss, often deadly poison. |
| Darkmane | Unicorn | Armor ignore – If you don’t have a discorder this would be the top choice pet. Can get the biggest hits thanks to Armor Ignore. |
| Skeletrex | Sagittari | Archer – Fires arrows quite fast and for good damage, a popular tactic is to sit them on the ledge so healing is not an issue. |
| Hellion | Ursadane | Crushing blow – Average damage dealers, better on a discorded target, but Armor Ignore still wins out in the long run. |
| Echidnite | Divine Guardian | Concussion blow – Average damage dealers, better on a not discorded target. Concussion Blow does 10 direct damage and halves the current mana of the target for 6 seconds. |
| Birling blades | Dendrite | Double strike – Unfortunately the weakest damage dealers at the moment, comes down to an issue with Double Strike itself being a weak special move. The fact that it often fails to hit being the biggest factor. |
| Prometheoid | Fairy | Healer – Don’t have a ton of experience with these guys yet, but they will heal pets that are nearby for a significant amount of hit points. |
Controlling Your Creature
Once you have chosen your creature double clicking the Wisp Orb gives you the following messages:
Target an object or creature to set the anchor
Target the Wisp Orb to change the leash setting
Target the possessed creature to change its aggression
Use these options to control the creature, toggling between them to achieve different results.
All creatures begin at power level one, normal, then gain experience as they fight. You may heal your creature using either healing, magery or veterinary skills.
Cautions:
When a player damages any orb-controlled creature, that player will receive retaliatory damage
Players now do less damage to orb-controlled creatures
Orb-controlled creatures now receive a damage bonus against players
Power Levels
1 – 3 Normal
4 – 6 Improved
7 – 8 Heightened
9 – 10 Magnified
11 – 12 Amplified
13 – 14 Inspired
15 Galvanised
These power levels also appear to be the source of the ‘army power’ figure shown in the Wisp Orb’s menu and are currently believed to represent the power of the ‘Army’ that is in the war zone. Army Power = creature’s level² so a level 8 creature will have an army power of 8 x 8 = 64. Three characters each having a level 10 pet in the war zone will therefore constitute an army power of 300.
Entering the War Zone
As you train your creature you will occasionally see the system message ‘The Call to Arms has sounded, but your forces are not yet strong enough to heed it.’ You may chose when you feel your pet is ready to answer the call by using the context menu on the Wisp Orb. This offers a choice of ‘Conscript’ or ‘Release’. Choose ‘Conscript’ when you feel ready to move one. Below you will meet creatures with higher power levels, which will allow you pet gain more quickly, if you can keep it alive. The Call to Arms comes thus:
The forces of your alignment are strong and you have been called to battle! You will be teleported into the depths of the dungeon within 60 seconds to heed the Call To Arms, unless you release your conscripted creature or it dies.
This is followed, after you have been teleported by further instructions:
You have been called to assist in a fight of good versus evil. Fight your way to the Lake, and defeat the enemy overlord and its lieutenants!
The Overlord is shielded from all attacks by players, but not by creatures possessed by the Wisp Orbs. You must protect your controlled creature as it fights.
The Lieutenants are vulnerable to your attacks. If you die during this battle, your possessed creature will fall. Furthermore, your ghost and your corpse will be teleported back to your home base.
Fight you way around the level, building the strength of your creature before finally reaching the center where you will find your foe with his familiar.
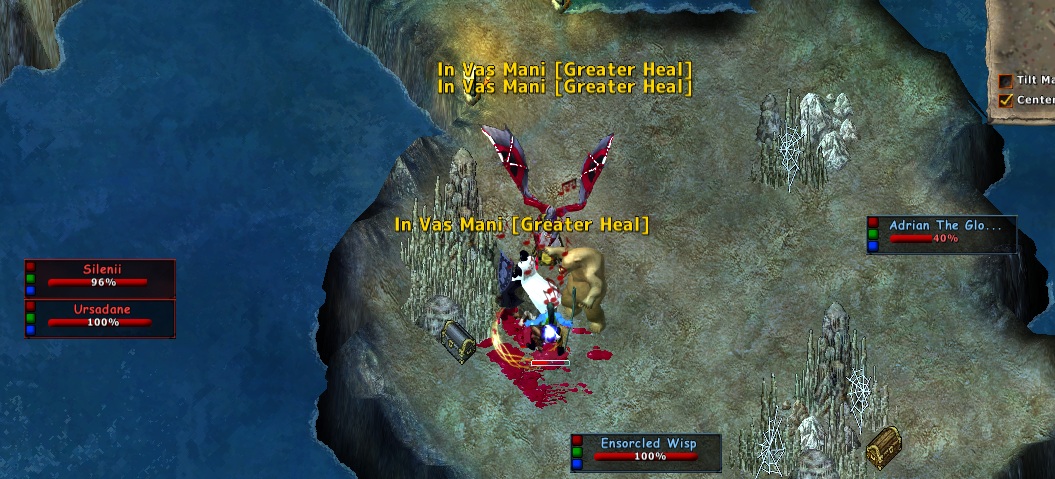
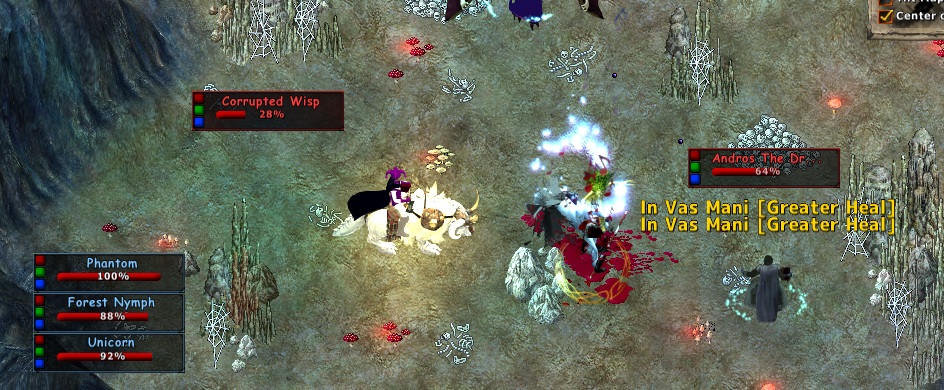
Evil karma characters will fight Adrian the Glorious Lord with his Ensorceled Wisp. Good karma characters will meet Andros the Dread Lord with his Corrupted Wisp. The wisps can be killed by players and are lootable, but will be re-summoned by the Lord.
This encounter was successful, resulting in an artifact for each of the two participants. Pets are a level 15 Silenii and a level 12 Ursadane.

This encounter, however, was not, resulting in the message
You were unable to defeat the enemy overlord in the time allotted. He has activated a Doom Spell.
| Despise Artifacts | ||||
| Compassion’s Eye | Unicorn Mane Woven Sandals/Talons | Despicable Quiver | Unforgiven Vail | Hailstorm |
|
Gargoyle: Leather Talons
|
|
|
Gargoyle: Gargish War Fork
|
Last modified: May 21, 2014


The key is discord. We used level 15 Satyr, Bear, and Treefellow. We finally killed the champ. Only one of us got an arty. Do you have to be partied?
1Ok, we did it again.Took 40 minutes with level 15 Satyr, Bear, Divine Guardian, and level 10 nymph. We were in party this time and nobody got a drop. So, apparently the writer’s of the guide were extra lucky to get two drops on two characters.
2On the 3 attempts I’ve made so far not enough damage was done to either the wisp or boss, both were at about 95% hp still left when 2 full mana, regened mages ran out of mana and then died, how much extra strength did u get before going down?
3Great work and a very nice guide.
4