Tutorials – Spiral Stairs 101
Return to: Designing and DecoratingThis tutorial gives information for the Classic Client. To build in Enhanced Client see this page:
http://uo2.stratics.com/homes-and-decorations/spiral-stairs-in-enhanced-client
Spiral Stairs 101
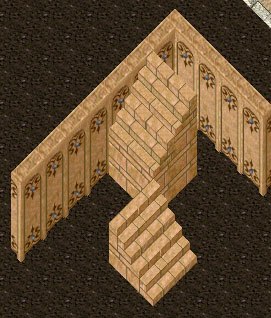
The basic L shape staircase:
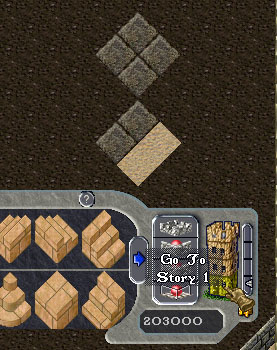
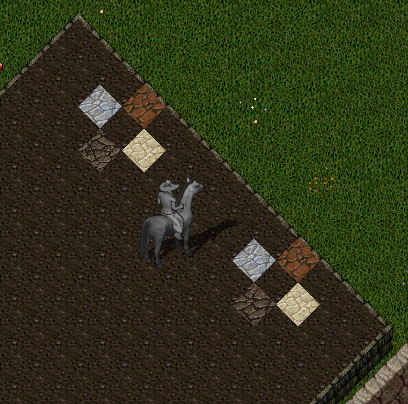
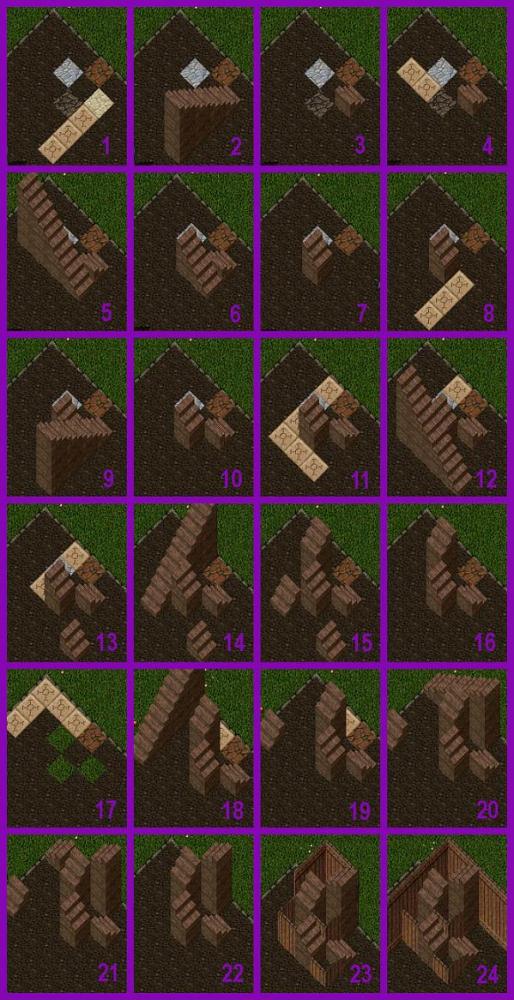
1. the black tiles are where your stairs will be, the teleporter tiles are where the landing is going to be.
2. First you put down the double set of stairs that will be deleting the “anchor” part of the staircase.
3. Hit your transparency button two times so you can see the teleporter tiles to delete them:
4. Select the story you are working on so everything becomes visible again.
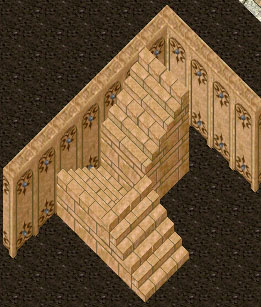
5. Place a new double set of stairs, facing north:
6. Now erase the original set of stairs you placed (both of them) so that in doing so you delete the bottom part of the two staircases you just built. Do not directly erase either of the two staircases you built in step 5!
7. Put down four telporters again:
8. Replace the two original staircases that you put down:
9. Repeat step 3 (hitting transparency twice and erasing the teleporters) and step 4 (hitting the floor selection button):
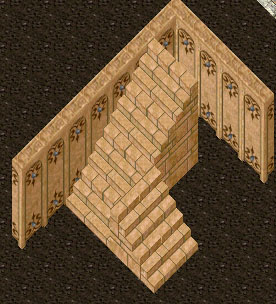
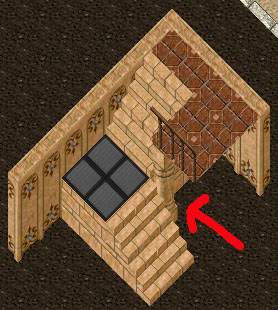
10: Now decide if you want a short wall to go under the landing. If you use the type of stairs that has a matching wall with medium height walls you can use those, or get decorative (or leave the space empty and use for storage, etc):
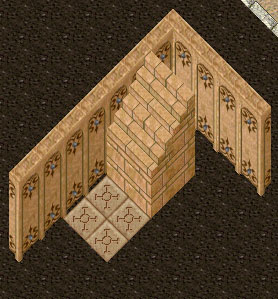
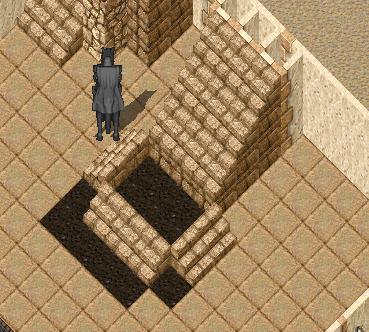
11. If the stairs you are using don’t have a matching middle height wall type and there is enough room you can use the stairs themselves as a wall. Place four teleporters as shown:
12. Place two stairs to line up on top of the teleporters:
13. Repeat steps 3 and 4 to get rid of the excess staircase:
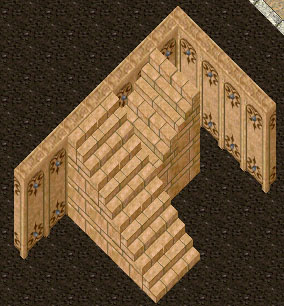
14. Depending on what you do with the floor above, you may need to put in a support column in the crook of the staircase:
Desperado’s tutorial:
1. Place your backside walls where you want them and then place 9 teleporters 2 tiles back from the walls.
2. Place the lower set of north stairs over these teleporters, then delete the teleporters through the method in the sticky post up top.
3. Lay down three teleporters as shown in the picture.
4. Place a west facing stair over the teleporters and cut the stairs.
5. Place your upper row of north stairs.
6. Delete the west facing single stair so it will remove the lowest steps from your second row of north stairs.
7. Place two rows of teleporters between the north facing stairs.
8 & 9. Place east and west facing stairs and cut as needed.
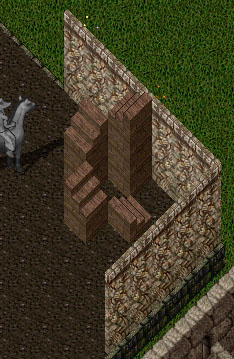
10. Finished product. Ignore the black gozas, only cloth I had on hand at the moment.
Spiral Staircase:
To build against the back wall on the west side you have to allow for 2 free tiles of space. For the east side you *can* build right up to the edge of the east side of the plot, but you can’t get on the stairs this way or build a wall. You can swap the direction the lowest steps are coming from so that you can get on the stairs, but there is still the wall issue.
In order to be able to get on the steps and walk past any wall you need to allow at least 2 free tiles of space from the east side.
Keep in mind that the first level of the stairs cannot be deleted by placing a teleporter underneath it, it must be deleted by removing any other stairs that have been built that fall in it’s path. So you have to build the stairs to remove those parts of the stairs before you build the actual stairs that you want.
Building a spiral staircase on the north-west side:
- Yellow = lowest tier, tier 1
brown = second lowest tier, tier 2
blue = third lowest tier, tier 3
red = highest tier, tier 4 Place three teleporters south of tier 1. - Place a south facing staircase on top of the yellow tile and all the teleporter pads.
- Click twice on the transparency level for that floor to make the staircase transparent and erase the teleporters. Click the floor level you are on.
- Place 2 teleporter pads to the west of the brown tile.
- Place a west facing staircase so that its first tier is south of the first tier of the stairs to be built.
- Click twice on the transparency level and delete the 2 teleporters. Click the floor level you are on.
- Erase the northern tier 1; this will also remove the southern tier 1.
- Place three teleporter pads in a southern row to the east of the tier 2 stairs.
- Place a south facing staircase so that it covers the teleporter pads except for its first tier.
- Click twice on the transparency level and delete the 3 teleporters. Click the floor level you are on.
- Place teleporter pads 1 north and 2 south of the blue tile, then 2 to the east of the southernmost tile.
- Place a staircase so that all the southern tiles are covered, and the first tier of the staircase is not over a teleporter.
- Click twice on the transparency level and delete the 3 teleporters that this new staircase is covering. Click the floor level you are on.
- Place a staircase so that it covers the 2 remaining teleporter pads and the blue tile, leaving its first tier not over a teleporter.
- Click twice on the transparency level and delete the 2 teleporters that this new staircase is covering. Click the floor level you are on.
- Delete the southeastern most tier 1 staircase in order to remove the westernmost tier 1.
- Click twice on the transparency level and place the five teleporters in the corner to the west of the red tile and south. Click the floor level you are on.
- Place a staircase so that it covers the three westernmost teleporter pads, except with it’s tier one.
- Click twice on the transparency level and delete the three teleporters this new set of stairs is covering. Click the floor level you are on.
- Place a east facing set of stairs so that the two teleporter pads and the red tile are covered by stairs, and the tier 1 of this set of stairs is not covering any teleporters.
- Click twice on the transparency level and delete the two teleporters this new set of stairs is covering. Click the floor level you are on.
- Erase the southwestern most tier 1 in order to get rid of the northwestern most tier 1.
- Place the shortest walls next to tier 1 and 2, the medium height walls in between tier 2 and 3, and the tallest walls next to tier 3 and 4.
- It can also be made into a corner. Remember when you put the goza mat down between tier 2 and 3 it will need to be raised high enough to allow you to walk on it, which will leave a gap. Placing an additional goza mat that is one level (in the housing tool) lower than the first mat will cover this gap.
Sarsmi, Desperado & the Home & Castle Forum
Updated June 2009
Lady Aalia
Last modified: January 7, 2014


