Tutorials – Roofing 101
Return to: Designing and DecoratingRoofing 101
The first thing I would recommend is to go to the options menu on your paperdoll, then go to the second tab on the left, “Pop-up Help”, and check “Use Tool-tips” if it is not already checked. You can now mouse over the various roof tiles to get their descriptions. This is a big help when figuring out what to do.
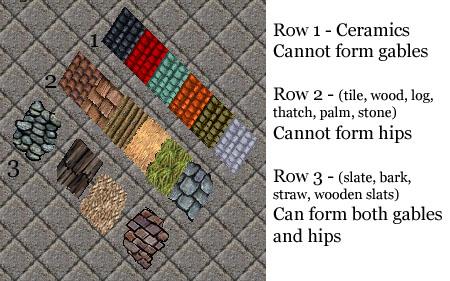
There are sixteen different tile sets available for roofs. However out of the sixteen types there are really only two different styles possible. This isn’t to say that you cannot have a lot of variation – just that you should be aware of the limitations of each roof tile type ahead of time.
With the release of the Samurai Empire expansion a large number of new tiles were added to the custom house building tool. Most of those tiles are used for building a roof, which previously wasn’t possible.

Styles of roof tiles available. Not all tile sets have the same pieces in them.

After selecting a roof style, you will see a page with the pieces that build your roof. This looks somewhat confusing at first, and is even worse when you consider that many roof styles have a second page of pieces as well! Worry not, this guide is meant to demystify the art of building a roof. This guide is not meant to show all the possibilities for roofing, but hopefully it will help introduce you to the tools and basic concepts of building a roof.
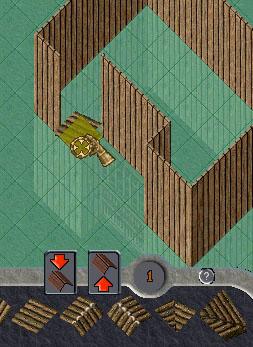
A closer look at the tools:

- If you have tooltips turned on in your options (the pop-up help menu, second down on the left), a description for each piece will show when you mouse over it. This is very handy when building a roof!
- The circle shows the current level of placement, in this we are on level 1. There are 6 levels altogether.
- The far left button is used to lower the current placement level
- The button in the middle raises the placement level.
Definitions
The two different styles:
Gable – The triangular section formed by a pitched roof. The pieces that can form four-sided gabled roofs are all the pieces except the ceramic tiles. Only four of the non-ceramic tiles can form fully hipped roofs.
Hip – a hipped roof slopes down to the eaves on all four sides. The “hipped” tile sets are all of the ceramic ones. They can form gables, but do not have the concave piece needed to form two gables at right angles to each other.
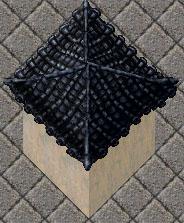
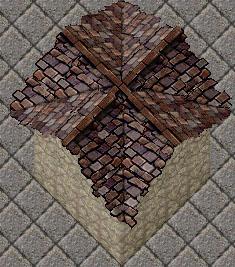
Forming a hip with a gabled roof tile:
This illustrates what the ceramic tiles are missing that they would need in order to form gables. (The concave pieces plus the X intersection)
X intersection – the piece needed to form the center part of the roof ridges. The ridges themselves are formed by intersections
In this first picture the center tile is an X intersection. In the second, there is no X intersection – the joining of the ridges is formed by four separate pieces.
T intersection – will normally form three gables and a hip
Y intersection – Used on rectangular areas so that all the edges of the bottom part of the roof will be even. This picture uses two Y intersections – the one that is brown is the north intersection (that is not a typo).
The ceramics (Row 1) also have Y intersection tiles like the third Row group does.
What’s all this level stuff?
Most of us are familiar with the decorator’s tool, using it to raise or lower items. You know you can lock a lantern down next to a wall and raise it to look as if it is hanging from the wall, even though you know it really occupies a floor tile. The roofing tool uses the same concept, but you choose the level of placement before you place the tile.
A full roof will occupy the entire top level of your house. Each square above your building will hold one roofing tile, raised to an appropriate level to give the desired look.

This image shows the south piece tile from the stone roof set placed in increasing levels left to right. Each piece has been placed on the green floor tile underneath it.
Tile names and how they face
The roof tiles are typically named for how they face. A south tile faces to the south, which means it would slant down towards the left of your screen. Likewise, a north piece slants away from you and to the right. Intersections are named for the pieces they join. An east-west intersection merges tiles that slant to the east and tiles that slant to the west. Intersections should typically be raised higher than the pieces they are merging, if you leave them the same height as the merged pieces then the edges will not match up.
An exception to the rule is for concave and convex intersections. These merge tiles whose are next to each other on the compass (IE south and east, or north and east).
A note before building a roof:
If you build your walls out to the edge of your property, and then put a roof on top, you will end up with this effect:

A peaked roof does not look very good this way; the gap is unsightly and the edge of the walls show around the roof. It is best to leave at least one tile free around your walls to allow the roof to overhang the edge of the walls, giving a much nicer finished look.
Another point to consider is the number of wall tiles in your building. Ideally, a roof will have an even number of side pieces on each side as well as the intersection, or peak part of the roof. This means that a roof will look more balanced if your wall has an uneven number of tiles. If you are building a flat roof this does not apply.
A simple roof:

Our first house is a simple 7×7.

I have laid down tiles to help illustrate the placing of our roof. The white tiles are actually outside the walls themselves, and this is where the outermost tiles of the roof will be placed. The blue tiles show where the peak of the roof will be, and the rows are numbered to indicate what level of placement each row will have.

So, starting with an East piece at level 1, we begin to build our roof.

Building the level 2 row.

Third level on the West side.

And finally, the EW intersection “peak” being placed on the 5th level to finish the roof.

Here is our simple roof finished.
An L-Shaped Roof
Our second roof will be a bit more complex, showing the use of intersection and edge pieces.

This layout shows the structure of our future roof. The blue tiles will be SW, SE and NE Edge tiles; the sandstone tiles will be SW and SE intersection tiles, and the brown tiles show the NS and EW intersection “peak” tiles.

Starting at level 1, placing the NE edge piece just outside the house walls.

Working on the North piece 2nd level

Placing the level 4 SW intersection piece.

The finished roof.
Building a gable
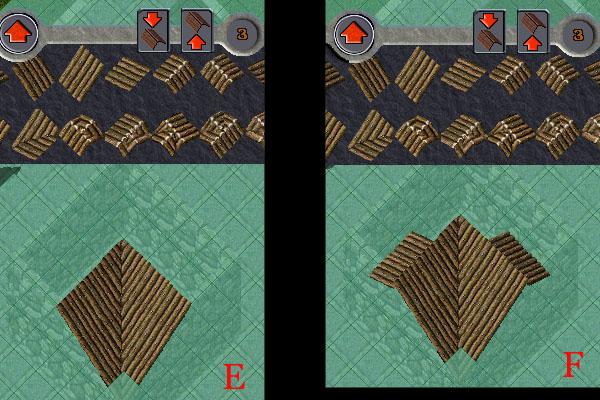
It is usually easiest to start with the south-east intersection. Place the tile where you want it, then raise the height by one (A). Place the same tile to the northwest of the original one and continue upwards till you have reached the middle, or right before it if you are using an X intersection (B). In other words, if your roof is supposed to be six by six, then you would place three south-east intersection tiles ascending towards the center. At this point you can go back to level 2 on the height indicator and choose the east piece. Put this piece west of the first south-east indicator that you placed and then pick the south tile (C).
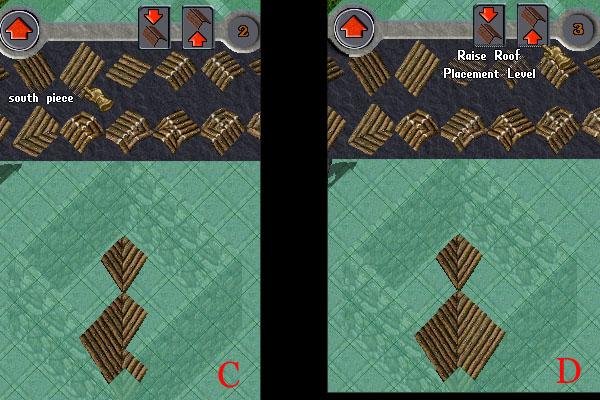
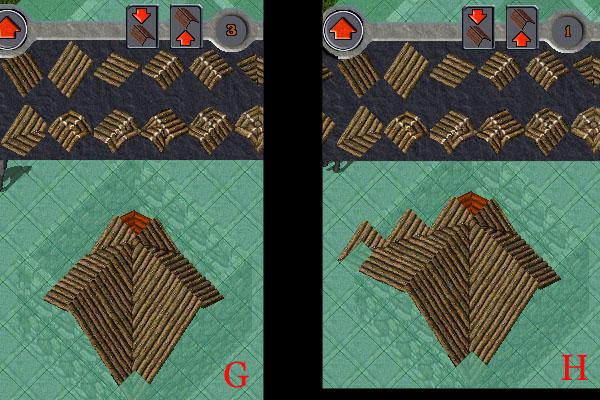
Place the south tile to the east of the original piece then raise the height indicator to three again (D). Place south and east tiles to form two of the ridges of the gable (E). Now do the opposite side. Select the west facing tile and place it against the east facing ones. Do the same for the south facing tiles, by placing the north facing against them (F). There should be two gaps, where you now should put the north-east and south-west intersection pieces (G). There will be a new gap to put the north-west intersection in, so do this. Lower the tool down to 2 and on the west side place a west facing and a southwest intersection next to it. Lower the height down to one and place a southwest intersection in the southwest corner (H).
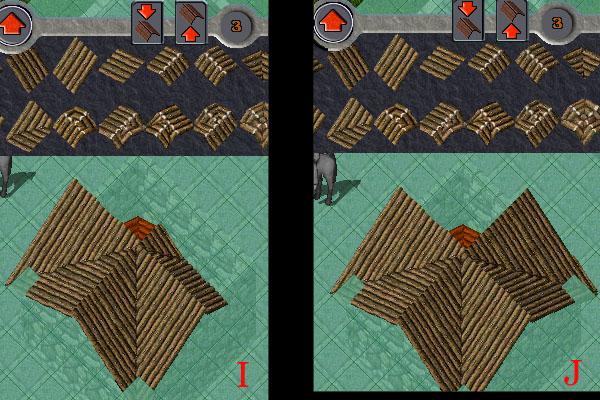
Rise by one and place a south tile north of the tile you just placed. Rise up to three and place two south tiles above it (I).
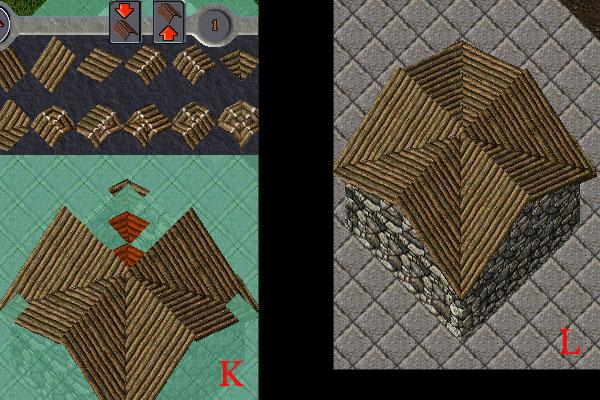
Fill out the northeast side just like you did the south west (J). Go to height 2 and put the northwest intersection piece in, then go to height 1 and do the same (K). Fill in with north and west facing pieces and you’re done (L)!
Creating an overhang
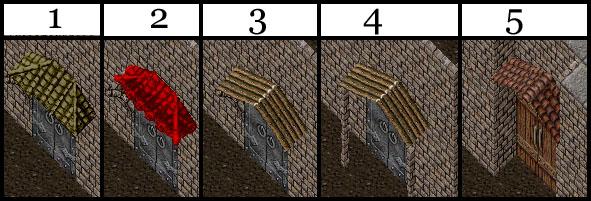
These are fairly basic overhangs:
- Flat plain overhang
- Flat fancy overhang
- Peaked overhang with arch support
- Peaked overhang with column support
- Recessed doorway with peaked overhang and hidden tile support
To make 1 or 2 you will need to use the SW interior or SW edge piece for the west side, the south interior or the south edge piece for the middle, and the southeast interior piece or the southeast edge piece for the east side. All pieces will be on the same level.
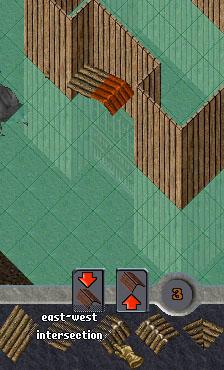
To make 3 or 4 you will need to use a west piece, an east-west intersection, and an east piece. The east and west pieces will be on the same level and the east-west intersection will be raised one higher than the others.
To make 5 you will need an additional west piece to act as a support. It is hidden on the second floor of the house next to the other west piece.
I will demonstrate how to make the fifth one:
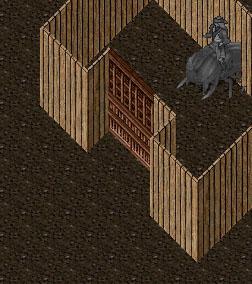
You will first need to make sure your doorway is visible. This requires an extra wall being set next to the east door:
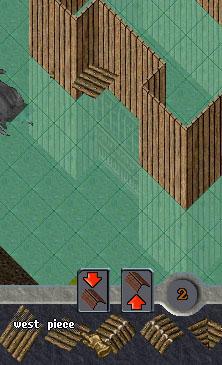
Build your second floor up to match the first floor. Add the supporting hidden roof tile, by putting it at level 1 underneath the southwest wall:
Raise the tool by a level and add the next west piece:
Raise the tool one more time and add the east-west intersection:
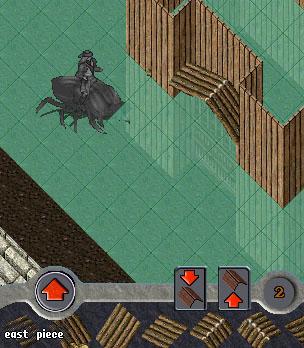
Lower the tool and add the east piece:
You are done!
Stand out overhang
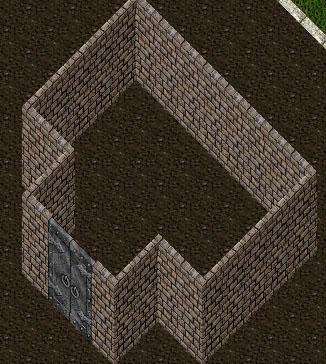
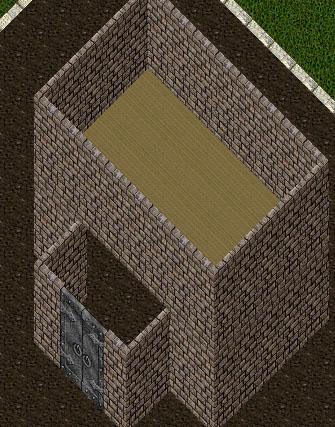
First, build your walls and add the second floor:
In this example we are going to do a peaked roof:
-
Starting with the west side, select a west tile roof on level one
-
Fill it in all the way to the wall and go up a level
-
Fill this one out to the wall as well, then select the east-west intersection tile and go up a level
-
Fill this one in to the wall, then go back down a level and select an east piece
-
Fill this one out to the wall, then go down a level
You are done!
Flat overhang
Build your walls and add the second floor:
This will create a flat overhang with decorative edging.
-
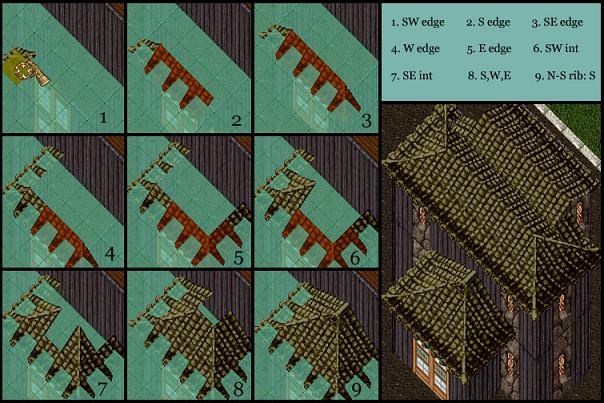
Place the south west edge piece at level 1
-
Place the south edge pieces
-
Place the south east edge piece
-
Place the west edge pieces along the west edge
-
Place the east edge pieces along the east edge
-
Go up to level 2. Place the southwest interior piece on the south west interior
-
Place the southeast interior piece on the south east interior
-
Fill in the south, west, and east gaps with those tiles
-
Go up to level 3. Place the north-south rib southern end in the remaining gap
You are done!
Advanced roofing
Really the best advice I have is to play around with the tool. Once you get a feel for what can work and what can’t, it will really help you to create more interesting designs.
Happy roofing !
Sarsmi & Blackheath
Updated June 2009
Lady Aalia
Last modified: January 7, 2014










WONDERFUL addition to Stratics Homes & Deco and extremely helpful. Thanks much Sarsmi & Blackheath for taking the time!
1You might want to note for users of the Enhanced Client that it does not have the helpful tooltips for roof tiles that the Classic Client does. EC users should keep a working copy of the CC on their computers for tasks such as this.
Many thanks for this article. Many folks just skip roofing altogether because it is so obtuse.
2